Uncategorized

Edinburgh Castle

Earthquake-Proofing Secrets from Ancient Rome: The Method That Kept Castello Delle Rocche Standing

Could This Ancient Technique Be the Future of Protecting Historic Buildings from Collapsing?

Historic buildings are irreplaceable treasures that connect us to our past, but they are also highly vulnerable, especially in seismically active regions. Protecting these ancient structures from collapse is a pressing concern. 

The Earthquake
That Threatened Castello Delle Rocche

In May 2012, a 6.0 magnitude earthquake hit northern Italy, devastating historical sites, causing widespread damage to the region’s historic and cultural heritage.


Especially in the important historic town Finale Emilia with roots tracing back to 1009. Finale Emilia was one of the main outposts for the Este Duchy, an obligatory stop along the river roots which connected Modena, Ferrara and Venice. Castello Delle Rocche, located in Finale Emilia, was among the affected structures.

 Though the earthquake’s impact was severe; half of the castle remained intact.

This unexpected survival intrigued the interest of the experts of Core Conservation to look into why some parts of the structure could withstand such powerful seismic forces.


Why half of this 15th-century castle crumbled, the other half stood firm. What was the secret behind its resilience?

Castello Delle Rocche

Historical Precedents: Learning from Ancient Rome

Concerned about the stability of historic buildings, Italian authorities initiated a programme to reinforce historic structures in seismic regions.


However, the widely adopted approach of applying several inches of cement reinforced with steel was found to cause long-term deterioration of the historic fabric. As a result, further research was required to identify a more suitable method for seismic and structural reinforcement that would preserve the integrity of these heritage buildings.


Enter Naldo Busato, a master craftsman renowned for his work on over 6,000 historic buildings, including the Venetian Lagoon World Heritage site. Drawing on ancient Roman techniques, Mr. Busato utilised a Roman lime mortar recipe, known historically for its flexibility and strength—both essential qualities for seismic resilience.  The recipe was meticulously tested and proven successful. 

The ancient Romans were master builders who used lime materials in their constructions, allowing structures to flex rather than break under stress.

Busato’s adaptation of this Roman technique has proven effective, meeting all 21st-century standards for structural reinforcement. This achievement led to the system becoming the first fully ETA (European Technical Assessment) certified lime-based structural solution for old and historic buildings.

The material is now available for purchase under the name MGN Betoncino Consolidante.

It can be applied in various ways:

  • For repointing weakened masonry
  • As a reinforcing render
  • For reinforcement by constructing and attaching a supporting wall to the weakened masonry (see picture on the left)
  • For filling cracks and gaps caused by earthquake and subsidence
  • As a bedding mortar when sections of the masonry are being rebuilt

The South Wing Had Been Reinforced for 2012

... when the earthquake hit Finale Emilia

In 2010 local authorities approved the seismic reinforcement of the South Wing of Castello delle Rocche using MGN Betoncino Consolidante.


When the earthquake struck in 2012, Naldo Busato’s solution stood the test of a 6.0 magnitude earthquake but the moment of recognition turned bittersweet. Due to lack of funding, only the South Wing was reinforced, resulting in the total annihilation of the other parts of Castello delle Rocche.

Finale Emilia Castello Delle Rocche

The Lime-Based Structural Reinforcement System:
A Modern Adaptation

This material boasts high compression strength, flexibility, and breathability—qualities that are crucial for reinforcing historic masonry without the downsides of modern cement.


The success of Castello delle Rocche’s survival can be attributed to the Betoncino Consolidante MGN system.


Inspired by ancient techniques, this lime-based structural reinforcement combines high compression strength with the flexibility needed for structural consolidation.

Unlike cement, which can be too rigid and harmful to old structures, Betoncino Consolidante MGN is breathable, gentle on original building materials, and adaptable to various types of masonry, from brick to stone. This makes it a sympathetic and effective solution for heritage conservation.

Reinforcement Render Application Process:
A Step-by-Step Guide

Applying Betoncino Consolidante MGN is straightforward and adaptable to your building’s specific needs. Here’s a quick guide:

  1. Masonry Repair: Fill any gaps, cracks and holes using Betoncino Consolidante
  2. Initial Application: Start with a consistent 15 mm coat of Betoncino Consolidante MGN on the affected masonry.
  3. Reinforcement Mesh: Lay a reinforcement mesh over the initial coat to add structural integrity.
  4. Second Coat: Apply another 10-15 mm of the material over the mesh.
  5. Fibreglass Anchors (optional): For added strength, use fibreglass anchors to connect the reinforced sections into the masonry, securing them in place.

Key Highlights:

  • High compression strength and adhesion power
  • Flexible and breathable, preserving the original fabric
  • Compatible with all types of traditional masonry
  • Performs well in damp or wet environments
  • High salt resistance
  • Free from cement, plastics, and polymers
This system can be used for various structural tasks, from
underpinning and crack repair to embedding structural timber,
all without the drawbacks associated with modern cement.

Rebuilding Teatro La Fenice from its ashes – awe inspiring, behind the scenes solutions

Gran Teatro La Fenice – The Phoenix – is the iconic opera house of Venice, Italy. It is one of the most famous and renowned theatres in Italian history, but unfortunately, it burnt to the ground on 29 January 1996, despite 10 hours of heroic efforts by firefighters on land, in the air, and on water. Nothing remained but a few charred walls…

The city of Venice has decided to restore the theatre to its former glory, as its name suggests.

The phoenix is a beautiful mythological bird that builds a nest of cinnamon twigs at the end of its life, sets it on fire, and burns to ashes with it. From the ashes, a new young phoenix is born.

The world renowned acoustics of La Fenice was most likely based on an extraordinary equilibrium. In fact there were some jutting parts at the top of the theater just below the gallery. And this was the La Fenice that was destroyed.

Guiseppe Paranello – University di Trieste

PROFESSIONALS AS ONE BIG ORCHESTRA

Through our teacher Mr Naldo Busato, Venetian Building Restoration Master, we had the opportunity to gain insight into what it took to revive this architectural masterpiece.


Witness the collaboration that harnessed the skills of the greatest masters to recreate the vision of the original creators. The team faced an extraordinary, almost impossible challenge: resurrecting the theatre, with its paintings, sculptures, world-class acoustics, and luxurious wall decorations, from photographs and documents from the archives. 

The soul of opera: acoustics

ARCHITECTURE - HISTORIC BUILDING RESTORATION

The main difficulty was that the entire roof, including the cupola the most important architectural element contributing to the world-class acoustics of the theatre burnt down and collapsed. Unfortunately it was not possible to examine the solutions of the original structure; only photographs and  previously recorded internal dimensions supported the the rebuild.


The task of rebuilding it was given to our tutor, Mr Naldo Busato, the last living member of the Venetian building restoration guild, who was trusted to have the experience and knowledge to rebuild this important element of the opera using traditional building materials and techniques. The project started in his workshop where a section of the cupola was built and tested. 


Imagine the building as a beautifully decorated wooden box within the outer walls, creating a unique visual and, above all, acoustic effect. It was known that a hollow place would be needed under the roof, followed by a lightweight wooden parabola serving as a sound reflector, on which the ornate lime plaster ceiling could be built. 

The construction of the timber structure in the workshop was followed by the application of the traditional Venetian Cocciopesto plaster.


The recipe was tailored for this specific purpose, ensuring good adherence to timber and increased flexibility to prevent cracking of the ornate painted ceiling, as the timber structure and the entire building were known to move slightly.


As shown in the photos, the plaster was carefully pressed through the gaps of the frame, and a layer of plaster was applied to the backside of the timber to ensure long-term stability.

WOULD YOU LIKE TO KNOW MORE?

CARPENTRY & FURNISHINGS

In the auditorium, all the boxes were crafted from well-seasoned larch wood sourced from the same woods that once provided for the original theatre. The work of a Milanese furniture maker deserves praise, as they meticulously recreated both the boxes and every piece of interior furniture.

INTERIOR: TRIBUTE TO THE ARTISTS

SCULPTURES AND RELIEFS

They are the masterpieces of Guerrino Lovato, a model maker from a Venetian mask studio, who successfully undertook the task of creating precise replicas of 18th-century sculptural forms. He achieved this by studying photographs of the originals, despite the distortion in the images.

PAINTINGS AND MURALS

Authentic paintings in the lobby and the Royal Box pay tribute to the work of Alma Ortolan and her team. The notes of the Meduna brothers (the architects who rebuilt the theatre in 1837), photographic archives, and laser measurements of the ruins helped create the most accurate computer drawings guiding the artists.

La Fenice

the dazzling ‘marble’ lobby

ARCHITECTURE ONCE AGAIN

HISTORIC BUILDING RESTORATION - BEHIND THE SCENES

Contrary to popular belief, the majestic marble patterns in the lobby were not entirely marble. A lighter, breathable material that can handle humidity well was required, so the Venetian masters used marble-effect lime plaster, when this current design first appeared in the lobby in 1837.


The material is known as Marmorino Veneziano, which translates to ‘little marble’ in Italian. It consists of a mixture of lime putty and marble dust. This classic 15th-century decorative finish was developed during the Renaissance in Venice, possibly as a lighter substitute for marble. Today, it remains one of the most elegant and high-quality decorative lime plasters sought after by architects and interior designers worldwide.


In 2004, the recreation of the luxurious interior plastering began in the workshop of MGN. Samples of the original marble patterns and colours were meticulously recreated based on available photographs. They were flawless in every detail, and the application of the Cocciopesto base with the Stucco Marmorino finish on top commenced in the theater.

DO YOU HAVE ANY QUESTIONS?

La Fenice

the Exterior

The façade of the building underwent thorough cleaning and stone work restoration.


The side walls have been lime rendered using Cocciopesto, a highly breathable and flexible lime render, following Venetian traditions.


Beyond tradition, Cocciopesto plasters and renders are used because they almost become one with the original brick masonry. Walls are constructed using lime and brick, and Cocciopesto plasters are also made from a mix of lime and crushed bricks. As a result, the plaster is as flexible as the building, with the same thermal expansion, porosity, and breathability.


It simply is the best plaster for the building, and the Venetians knew it.

And so it was that La Fenice – The Phoenix - was resurrected as a tribute to Venice's better days

It is always a deeply emotional experience to sing Violetta in a newly reborn theatre. It is liket the story of Violetta who dies who lives, is burnt by life and is reborn again, through love. You need a lot of love to rebuild a theatre. Music is love.

Patrizia Ciofi – Opera Singer

ARE YOU STRUGGLING WITH A CHALLENGING PROJECT?

We consult you free of charge

LEARN MORE ABUT THE ABOVE MENTIONED PRODUCTS

Marmorino MGN

Luxurious lime - marble finish in 24+ colours

Cocciopesto MGN

Lime 2nd coat & render, great humidity regulator
hemp lime insulation

For those who put health first when deciding on thermal insulation

Fortunately, in the UK, it is well-known that lime plasters are antiseptic. But there is a family of products—hemp-lime plasters—that provide a living environment where it is a relief to exist and breathe.


The existing hemp-lime insulating plasters, however, have been difficult to work with, requiring the masonry to be perfectly prepared—not too dry and not too wet—a fine balance indeed.


Recently, the team at Core Conservation has been working on producing a 100% nature-friendly, green hemp-lime plaster for Carbon Zero enthusiasts,  

… that not only is environmentally friendly but also capable of competing with modern insulating materials, addressing a previous weak point of hemp-lime insulating plasters.


Our team quickly realised that the Italian master from Venice is one step ahead of us with his fantastic Canapaterm MGN product. Rooms plastered with Canapaterm radiate surprisingly pleasant warmth, even when there is no heating.


In analysing its success, we discovered that an important factor, usually overlooked in England, was at play.

Excellent thermal comfort depends on a material's additional ability to reflect heat.

Everyone knows that a material’s insulating ability is determined by its thermal conductivity.


However, not many are aware that thermal reflectance starts to play an important role—and can significantly impact your heating bill—when a material reflects over 90 percent of infrared (heat) radiation. In other words, when heat emitted by our bodies and other heat-generating sources does not escape through the walls but remains within the building. I.e. infrared waves are not absorbed by the masonry; instead, they are reflected back into the room.


Mr Naldo Busato, Venetian Building Restoration Master, understood the significance of thermal reflectance when perfecting his hemp-lime recipe. Consequently, Canapaterm MGN reflects over 90% of infrared waves back into the room, positioning this insulating lime plaster in the premium thermal insulation category.

Canapaterm MGN

This smart mix of hemp, lime, and white volcanic sand is a true enhancement to the comfort of your home

Canapaterm MGN

As is the case with every insulating product, the thicker the insulation, the warmer your home. Based on actual experience, when applied at 1-2 inches thickness, this is what you can expect from this hemp-lime insulating plaster:

  • Within two hours of having the heating on, the house will warm up and retain the heat for much longer than before.


  • This lime-hemp plaster will buffer any kind of moisture, including condensation, leaving the house free of mould and fungi, thus reducing the risk of respiratory problems.


  • The highlight of using hemp-lime as a building material is its immediate positive effects on indoor air quality and the microclimate of your home.

  • High-performance acoustic insulator


  • Guarantees greater energy savings on heating


  • Cools your building in the summer and warms it in the winter by regulating internal humidity


  • Reduces pollution by absorbing CO²

Quantified quality characteristics of the product are available here, under ‘Specifications’.


Play Video

Do you like the product but not sure if it's for you?

No problem, just drop us a question 

It is very easy to work with the Canapaterm MGN hemp-lime mix

When applied to the prepared wall surface, it adheres very well. Applying this insulating lime plaster at a thickness of two inches in a single application is not a problem.


“The hemp lime is a very good product. Extremely strong when cured, breathable and sticks very well. It will shrink but because of the binding of the hemp won’t crack much.” DM – Builder

Reduce our carbon footprint with hemp

Lime plaster

„As with all plant-based materials, carbon is stored during plant growth and continues to be stored through its use as a building material. At the end of its life, it can either be remixed with new material, used as biomass or otherwise returned to the soil; at this point it slowly releases the carbon through decomposition while also returning other nutrients to the soil.”

Canapaterm MGN

Hemp-based, insulating lime plaster. Great thermal and acoustic insulator, reducing CO2 pollution, regulating internal humidity.

hemp lime insulating plaster

Should you have any questions or projects to discuss, please don’t hesitate to reach out. The building conservation specialists of our team are happy to chat with you, free of charge.

Damp Chimney Breast Restoration

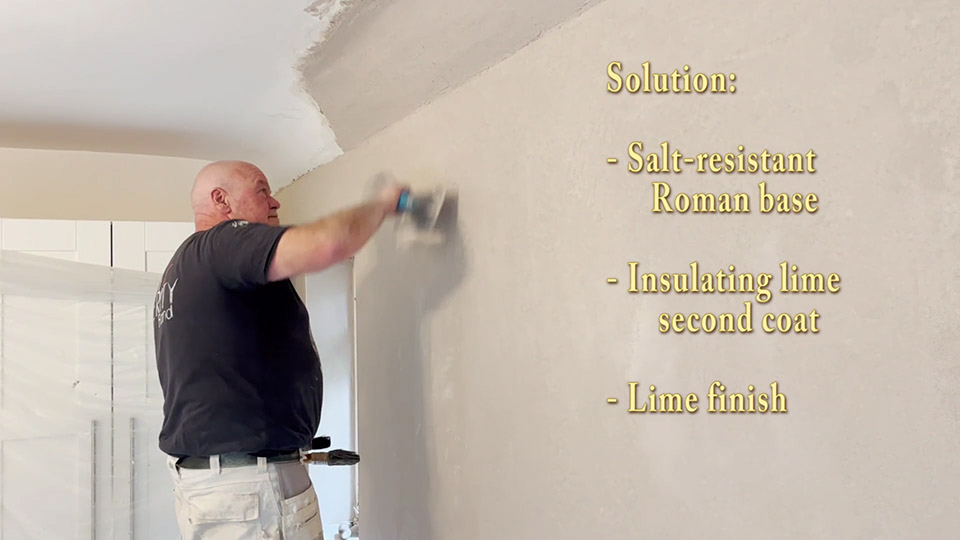
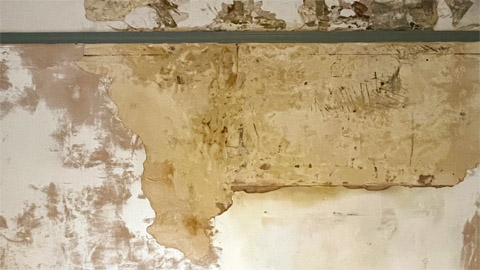
Chimney breasts, how to sort out ugly discolourations?

Lets talk about

The most mysterious dampness problems on chimney breasts

There exists a particular type of ‘dampness’ issue affecting chimney breasts, leading to problems such as discolouration, inexplicable damp patches, flaking paint, and crumbling plaster.


These issues may manifest even on internal walls not exposed to driving rain or any discernible moisture source, leaving owners of older buildings perplexed regarding the origins of these issues. The patches may exhibit a cyclical nature, fading during warmer summers only to resurface dramatically after intense rainfall, often occurring within the interior walls of the house.

Understand The Why

The case study below will provide you with a comprehensive understanding of the intricacies surrounding chimney breasts and fireplaces, explaining why these dampness problems are so stubborn and just keep coming back.

Damaged Masonry
plaster damage
Damp Wall
discoloration and tidemarks

Now, upon seeing such damage, one’s initial thought might be that there must be some sort of moisture ingress or a chimney leak. However, in this specific situation, our client has already addressed pretty much everything they could think of: chimney, roof, flashing around the chimney, and rendering over the chimney breast. They even took down one of the chimneys and roofed over it. So, at this point, it has become really perplexing:


Why do these discolourations keep coming back?

Professional Dampness Survey, Laboratory Level Analysis

At this point, the building professionals at Core Conservation embarked on a meticulous investigation, conducting a dampness survey with a particular emphasis on critical areas. The findings revealed that the client had done an admirable job in rectifying damp issues, and indeed, the masonry is now thoroughly dry.

Moisture analysis
In-depth moisture analysis by taking samples from the wall...
moisture analysis, building survey
...and measuring their moisture content using a laboratory moisture analyser.

We also analysed the type and extent of salt contamination in the samples using chemical test strips, and found significant sulphate contamination. Sulphates, being the byproducts of coal and log burning, are commonly referred to as chimney salts.

Salt analysis Building survey
Field laboratory analysis, using chemical test stripes, ...
... of the samples taken from the chimney breast.

In instances where a century’s worth of log or coal burning occurs in a fireplace, a significant amount of soot and ashes, laden with sulphates, accumulates throughout the flue.


Due to fluctuating temperatures and leaks from rainwater, these sulphates dissolve and permeate the masonry, resulting in yellow or brown discoloured patches along the chimney breasts; salty discolourations that can be highly corrosive to the plaster.


If left untreated for an extended period, mysterious damp patches, flaking paint, and ultimately crumbling plaster become inevitable outcomes of these circumstances.


Excessive salt contamination beyond a certain threshold can even draw moisture from the room’s atmosphere. On rainy days, when the air’s relative humidity is elevated, this moisture absorption alone may suffice to generate damp patches. In cases of extreme salt contamination, these patches become permanent. This explanation elucidates the origin of those mysterious damp patches, which can occur on chimney breasts or around fireplaces.

If you have any queries regarding our building surveys and solutions, please feel free to get in touch.The team at Core Conservation utilises a wide array of state-of-the-art instrumentation, including non-invasive dampness microwave scanning, thermal imaging, and more.


You are welcome to call us and a conservation specialist  will answer your project related questions, free of charge.

The Solution

#1 Always start with fixing any rainwater ingress

Chimney leaks

A comprehensive chimney inspection, paying close attention to every detail – from the chimney pot and cowl, to the condition of the chimney crown, the state of the masonry and pointing, and the flashing around the chimney – can typically identify the sources of water ingress, and rectifying these issues is crucial.

#2 Hack off the existing, salt-contaminated plaster. Do not attempt to skim over it!

Fix chimney breast

Removing the contaminated, old plaster, cleaning the surface to eliminate dust and salts, and then thoroughly wetting the surface are essential for ensuring good adhesion of the new, salt-resistant lime base coat.

#3 Apply salt-resistant lime base coat

In this specific example and with this specific client – because dampness problem is already sorted – the old, salt contaminated plaster did come off and a suitable salt resistant lime plastering system was applied.

Rinzaffo MGN
Rinzaffo MGN

The Rinzaffo MGN Roman lime base coat is both salt-resistant and breathable. This lime plaster can withstand the effects of all masonry salts, including chlorites (sea salts), nitrates (ground salts), and sulphates (chimney salts), for decades without breaking down. It also acts as a water barrier, protecting finished wall surfaces from potential water ingress from the chimney stack and preventing damages.

#4 Apply Lime Thermal Insulation

Applying a second coat of insulating lime plaster is crucial for these external walls. The warmer the wall, the greater the comfort achieved, not to mention the prevention of mould and fungi, which often thrive in environments where the room is warm, but the walls are too cold. In this specific case, we used the award-winning Termointonaco 2020 MGN, high performance insulating lime plaster.

Lime Thermal Insulation
Termointonaco 2020 MGN

#5 Apply a breathable lime finish

For this project, we opted to use the non-cracking and flexible traditional lime finish known Rasacol MGN for it’s longevity.


These steps effectively resolve a damp chimney breast for good.

Rasacol MGN
Rasacol MGN

Do you have any questions or maybe need free consultation over the phone? Do not hesitate to get in touch, we are dedicated to help you

Historic Building Restoration

Historic Building Restoration Challenge – An Award Winning Project

With this article, our aim is to present conservation-minded solutions to the most common challenges encountered when restoring old or listed buildings, including:

– A high water table coupled with the absence of a damp-proof course

– Lateral moisture penetration through walls in contact with the earth
 
– Significant salt contamination within the building fabric
 
– Horizontal rainwater infiltration through the solid masonry
 
– The necessity of insulating the building to an acceptable standard without substantially increasing wall thickness.

The Cob House Project

Best Renovation/Restoration Project 2024 Award Winner

The Cob House is a 300-year-old Grade 2 listed converted block of stables, originally serving as the stable block to Steanbridge House in Slad, nestled in the picturesque Cotswolds.


This project was approached as a conservation endeavour, with the client’s primary focus being the preservation of the building’s character while bringing it up to contemporary standards fit for the 21st century.

Listed Building Restoration

However, shortly after commencement, it became apparent to the architect that certain aspects of the project posed greater challenges than initially anticipated. The lime plaster applied to the walls began exhibiting discolouration and crumbling in various areas, mere months after its application.

Damp Stone Wall

This is when we got involved.

Analysis of The Problem: dampness and other issues

Through detailed field laboratory analysis, we discovered that there were five main problems to overcome:


– High water table (as visible from the water level of the pond)


– Sideways ground moisture penetration through earth touching walls


– High level of salt contamination of the building fabric (the structure was a block of stables, where large quantities of decomposing organic matter created significant nitrate contamination)


– No damp proof course (nitrate saturated ground moisture could climb inside the freestanding masonry unchecked, bringing dissolved nitrates up into the masonry)


– Solid stone masonry is exposed to the elements (after a few weeks of heavy rain the stone work could get wet to the degree where some moisture appeared in the inside, causing patches and plaster damage)


In other words, we were dealing with a structure with excessive dampness problems coming from sideways rain water penetration, sideways ground moisture penetration through earth touching walls, excessive rising damp due to high water table, and large quantities of erosive salts.

Dampness Survey

On-site salt measurements

Accurate specification of traditional solutions and building materials

Mindful of the project’s conservation ethos, the building conservation specialists of team Core Conservation devised a renovation concept aimed at addressing the dampness issues and achieving wall insulation with a U-value of 0.5, exclusively employing breathable lime-based products.

1. 10-20mm MGN Rinzaffo salt- and moisture resistant protective lime base coat (an original Roman recipe from Marcus Vitruvius Pollio ancient Roman architect)

 
2. 50mm of high performance insulating lime plaster called Termointonaco 2020 (Expanded amorphous microsilica-lime mix, resulting in great insulating characteristics: λ0.043)
 
3. 10mm of AeroGel-lime superinsulating and heat reflective lime plaster (AeroGel-lime mix, resulting in extraordinary insulating characteristics: λ0.016)
 
 
Additionally, on client’s request, we supplied a breathable Roman lime floor as well.
 
 
It’s impossible to share all the interesting details about the materials in this article due to space constraints. ☺️  However, we encourage you to click on the hyperlinks for more detailed information, which will open in a separate, new window.
Roman Waterproofing
Roman Waterproofing

Need help?

Supply

Materials have been delivered to site, in sustainable paper packaging:
Aerogel Insulating Lime Plaster

Application

MGN Rinzaffo salt- and moisture resistant Roman base – machine application:

Lime Plastering a Fireplace
By incorporating AeroGel particles into lime plaster, an innovative solution was introduced that offers exceptional thermal performance while remaining in line with traditional lime plastering techniques. Through this method, a wall insulation with a U-value of 0.5 has been met, with a thickness of under 40mm.
 
High performance insulating lime plasters – machine application:
Aerogel Lime Insulation

Roman Lime Floor Screed

Roman Lime Floor Installation
Lime Floor Screed

You can find more information about breathable, heat storage lime floors by clicking here

The Results in Pictures

Charming traditional aesthetics with 21st-century performance capabilities

Listed Building Restoration
Insulating Stone Walls

By employing a blend of Roman Waterproofing techniques and AeroGel insulating lime plasters, alongside Roman lime floor screed, the property was meticulously restored into a cosy and dry period family home.

Lime Plastering
Traditional Lime Plaster

In our understanding of traditional architecture, Roman solutions and materials excel under challenging conditions. Regrettably, the techniques and materials used in Roman architecture are often considered ‘lost technology’; and are no longer in use.

However, this project serves as a compelling demonstration that the wisdom of ancient Roman architects remains accessible and applicable to our historic buildings, yielding impressive outcomes, just as they did over two millennia ago.

Breathable Lime Insulation
Traditional Lime Insulation for the Roof Space

This project exemplifies many of the typical challenges encountered with older buildings, as well as the expectations involved in restoring a listed property to a high-end family residence.

Listed Building Restoration
Restoring a Stone Building
300 Years Old Property Full Refurbishment
Building Conservation Best Practices
 
At Core Conservation, our objective is to establish a positive precedent within the building conservation sector, demonstrating that great traditional solutions are available, even for the most demanding circumstances.

Damp Basement or High Water Table? – fix all the 5 sources of damp

How to deal with moisture?

... and how to keep water out using traditional, breathable materials?

It is possible to render cellars, basements, and underground structures watertight by systematically addressing each of the five common sources of moisture individually:

1. Penetrating damp: The walls are in permanent contact with the damp soil. Consequently, water infiltrates the building fabric, leading to persistent evaporation on the interior surfaces of the wall.


2. Ground waters: Old cellar walls and floors, being situated at the lowest points of the building, absorb water and salts from the ground. In scenarios of high water tables, this can lead to excessive rising damp or even flooded basements.


Waterproofing

3. Water ingress: The ageing process, coupled with dampness and continual salt crystallisation, deteriorates the pointing and building fabric, rendering old basements vulnerable to more serious water infiltration and leaks.


4. Condensation, and often mould: The continuous evaporation from the walls and floors leads to elevated air humidity, inducing condensation on cold surfaces. This condensed moisture is then recycled back into the walls.


5. Dampness caused by past incorrect renovations: Renovating old cellars with non-breathable materials, such as cement tanking or damp proof membranes, causes moisture to accumulate behind them. Eventually, this trapped moisture will find a pathway in, manifesting as serious damp issues wherever it emerges.

The Ideal Waterproofing Solution Must Be...

When restoring or converting an old or listed cellar, you’re somewhat constrained in your options. You’ll need a solution that not only performs effectively but also complies with all building conservation requirements. Hence, the ideal waterproofing solution must be:


–  Waterproof: To prevent liquid water infiltration, penetrating damp, and groundwater seepage—effectively maintaining dry conditions in underground areas.


–  Breathable: To allow water vapours to pass through, thereby preventing the buildup of moisture within the building fabric.


Salt Resistant: The soil surrounding cellars contains plenty of nitrates, a type of salt commonly present in ground moisture. The crystallisation of salts is the primary cause of premature deterioration in lime plasters. Any lime plaster intended for use in cellars should be capable of withstanding all types of salts without sustaining damage.


Not too hard: So it doesn’t harm the original, more delicate building fabric while possessing adequate mechanical strength to withstand water pressure.


Long lasting

How is it achieved?

A live demonstration featuring a thermal scan test

A Nod to Roman Wisdom: the 1st coat

The ancient Romans had the solution: by perfecting the mixture and incorporating volcanic ashes into the recipe, they created a lime mortar that was porous and breathable, yet possessed improved mechanical strength and ample water resistance, making it ideal for cellar applications.


This is one of the rare recipes that have been rediscovered and are now available for application in old buildings in the 21st century, known as Rinzaffo MGN Roman base.


Its internal pore structure has been brought to life again, allowing it to block (larger) liquid water molecules while permitting (smaller) water vapour molecules to pass through. In essence, it functions similar to a highly refined filter.

A Nod to Roman Wisdom: the 2nd coat

Cocciopesto Deumidificante MGN is an Ancient humidity regulator, instead of extractor fans or dehumidifiers, and it worked just fine with a bit of natural ventilation present.


This was the Romans’ solution to condensation and mould issues.


This ancient innovation rooted in the concept that the porosity of lime and crushed terracotta provides the plaster with excellent vapour permeability and exceptional air humidity regulation capabilities.


Originally a Phoenician plaster adopted and refined by the Romans, it demonstrated remarkable success in constructing aqueducts, Roman baths, wells, and underground structures.

Mr Naldo Busato, CEO of MGN

Third generation Building Restoration Master craftsman, with hands-on experience from the Venice World Heritage site

Practical Application

The Crypt Waterproofing Project

Should you have any questions, please don't hesitate to contact us and let us know what else would you like to read about

Barn Conversion – 5 quick tips to get it right

This article aims to aid you in surmounting the formidable challenges often encountered when undertaking a barn conversion project. While it may seem daunting at times, with proper guidance, it can be navigated adeptly.


When converting a barn, one must bear in mind the inherent truth: these structures were originally designed for livestock, not human habitation. Livestock seldom protested when the premises were draughty, fissures emerged, or walls became damp and emitted coldness, among other issues.


The chasm between the comfort standards required for animals and our contemporary 21st-century expectations of a habitable dwelling is substantial. 

Step 1. Building Survey: don't skip salt measurements

Lovas

This is one of the least known aspects of a barn conversion, but ignoring it might result in “mystery damp” and early plaster decay in your otherwise new and lovely barn conversion.


Let me explain: Barns keep accumulating organic byproducts for decades, and in some instances, for centuries.


Due to the absence of a damp proof course, rising damp transports decomposed organic matter and its salts, known as Nitrates, into the walls. It’s crucial to assess the extent of this contamination in your barn structure, because decades’ or centuries’ worth of poo and pee (excuse my French) means a LOT OF NITRATES.

Depending on climate conditions, salts will attract and hold onto more or less moisture all the time. When the weather is getting dryer, the salty masonry will want to let go of some moisture, when the weather is getting rainy it will absorb moisture, creating funny patches (often referred to as mystery damp).


Additionally, such salinity is causing a very erosive environment. Not many building materials survive it. Plasters on a salty wall start crumbling just after a few months and metals do corrode within a year or two, making a new renovation project necessary.

A meticulous and precise survey is crucial; otherwise, you might find yourself in a home plagued by cold walls, damp patches, and crumbling plasters — issues that could have been averted through the use of appropriate materials, precise specifications, and correct techniques.

Step 2. Structural Replacements and Repairs: avoid cement

The use of cement mortars and embedding timber within cement can lead to moisture accumulation behind the cement, causing the encased timber to begin rotting.


During structural repairs, like consolidation, rebuilding specific sections of the building, or replacing timber, it’s imperative to adhere to the original breathable design. This involves utilising lime mortars, to ensure successful renovation without side-effects.

Step 3. Make the Structure watertight

This is where one would fix the roof, tidy up pointing, install new windows, a damp proof course and floors – to make sure one has a watertight and dry shell. Two different moisture sources can be distinguished in a barn conversion project:


Rainwater ingress, i.e. falling moisture (through roof leaks, bad pointing and bad or missing windows/doors, etc.), which is sorted out routinely with success. You probably won’t have problems with that.


The more challenging issue arises from soil evaporation, where moisture ascends from the ground through the floor or by means of rising damp into the walls. This form of moisture is less conspicuous as it primarily moves upwards in a vapour state, remaining invisible. However, when the vapour encounters cold surfaces, salts or tiny capillaries, it condenses into visible dampness. Soil evaporation, being a lesser understood facet within the industry, often leads to incorrect or neglected treatment.

Step 4. Floors

The conventional method of flooring involves a membrane and cement screed, which isn’t ideal for barn conversions. This setup obstructs ground evaporation, leading to moisture accumulation beneath the structure. This moisture then migrates laterally, seeking evaporation points along the walls if no damp proof course is in place to impede it.


While installing a cement floor is a viable option, it’s crucial to plan ahead for the heightened risk of rising damp by designing wall treatments accordingly.


Opting for a breathable flooring type, like a lime floor or suspended timber floor, proves to be a better alternative. This choice significantly reduces moisture infiltration into the walls. It’s essential to reiterate that this moisture is often heavily contaminated with nitrates, a byproduct of decomposing animal waste. Consequently, preventing such moisture from permeating the walls becomes a priority.

Step 5. Insulation, Plastering and Decoration

Building Control will require dry walls and a specific insulation standard to certify the barn conversion as habitable. Consequently, addressing damp issues and insulating the structure are imperative requirements.

Our expertise extends to providing conservation-friendly specifications, applicable even to listed buildings.

To provide an overview, there are essentially two viable options available for consideration:

1. Insulated stud walls. This option option is the “budget” option, especially if you’re aiming for a modern aesthetic.

This involves battening the walls out, installing insulating panels and plasterboard, albeit sacrificing some space from the living area.


You would start with stripping the wall back to bare brick or stone, clearing away any loose debris and rubble. It’s advisable to avoid the ‘dot and dab’ technique, which involves directly gluing the plasterboard to the solid masonry, as this accelerates salt migration, often resulting in damp spots at connection points.


Utilising timber or metal battens with a substantial air gap is recommended, ensuring meticulous care to prevent debris accumulation within the gaps, as demonstrated in the video above. This method prevents salts from transferring into the insulation or plasterboard installed atop.


For crumbly walls, applying a coat of Rinzaffo MGN lime plaster before employing metal or timber battening is advisable to consolidate the masonry.

2. Insulating lime plaster, when you are going for a traditional look or finish.


Salts tend to migrate into standard lime plasters, which may initially provide some buffering for a few years. However, this often initiates a continuous cycle of re-plastering, gradual deterioration, and further re-plastering.


This tendency likely led traditional builders to mistakenly opt for cement in the past. While cement is more resistant to salts, its use damages the building fabric, essentially encasing the walls in a manner that restricts breathability. Consequently, dampness persists, emanating from both the ground and external sources.


When dampness is unable to evaporate, it ascends, creating an environment characterized by coldness, dampness, and poor health conditions, ultimately jeopardising the structural integrity.


An optimal resolution involves employing a breathable and salt-resistant lime base plaster, such as the Rinzaffo MGN waterproof plaster, serving as an effective barrier against salt intrusion. Over this, additional thermal lime plaster coats can be applied for thermal insulation until the desired level of insulation is reached, followed by a breathable finish and decorative treatment.

We are Here to Help

We understand that this is quite a substantial amount of information to absorb all at once. The team at Core Conservation is readily available to assist you with any specific queries or projects you may have, whether through written communication or over the phone, catering to your preferred mode of contact.

3 Tips to Fix Damp, Cold Solid Brick Walls for Good

The typical problems

There are actually 2 typical problems with solid brick walls:


1. After 1 or 2 weeks of heavy rain moisture can appear on the inside.


2. When the temperature is dropping outside the masonry is getting really cold and if the wall is not insulated, you wind up with condensation and mould.


The Solution Step by Step

Step 1: Make your lime plaster waterproof

Yes, it’s possible, with breathable lime.
A live demonstration from Venice:

This waterproof lime plaster originates from an ancient recipe crafted by the Roman architect Marcus Vitruvius Polio. He honed this formula to construct seaside docks, Roman baths, and even to seal The Colosseum for simulated “sea battles.”


After extensive research, our Italian partner, Naldo Busato, Venetian Building Restoration Master, collaborated with the Polytechnic University of Milan. Together, they successfully replicated the original Roman recipe. The resulting building material is now known as Rinzaffo MGN Roman Waterproofing plaster.


This product has also garnered multiple awards in the UK.

Step 2: Insulating lime plaster for a warm wall, no mould, no condensation

Yes, it’s possible, with a breathable lime Super Insulator

We’ve got a solution to your chilly walls that’s different, simpler, and incredibly effective – the Aerogel Lime Plaster.

This award-winning blend of aerogel and lime is a super insulation option. It’s the secret to transforming the temperature in your home.

The beauty of this is that even a slight increase in thickness can significantly impact your wall’s surface temperature.


A warmer wall means saying goodbye to condensation and mould. We’re talking about adding as little as 5-10 mm of thickness.


After that, it’s easy to finish and achieve a smooth texture using a sponge float or by sanding it down.

When you need more insulation, you can increase the thickness of the second insulating layer to meet specific U-Value targets (which measures a wall’s insulating capacity).


For instance, achieving a U-Value of 0.5 would mean using 20mm of AeroGel-lime insulation. This level of 0.5 is commonly sought for heritage properties.

Step 3. Lime finish for mechanical protection, beauty and smoothness

The AeroGel-lime plaster delivers a smooth and pleasing finish, yet it’s quite soft. If you require additional durability or desire exceptional aesthetics, there are several finishing options to choose from:

RAsacol500by300

Rasacol MGN

Flexible, durable, non-cracking traditional lime finish.

11 Robert Marsden400by300

Intonachino Arenino MGN

Traditional, coloured, smooth lime finish, comes in 24 colours. Suitable for internal or external use. Stable and weatherproof colours, ageing similarly to historical plasters, with enhanced decorative qualities over time. 

Preparations

MootHall600by300

Going back to bare brick

If the wall isn’t damp and the old plaster is in good shape, there’s no need to remove it. Simply applying AeroGel insulating lime plaster on top can tackle any condensation or mould issues.

However, if you notice any signs of dampness, it’s highly advised to remove the old plaster. It might not be doing its job properly or could be the wrong type altogether.


Cement and gypsum plasters on older buildings can be especially troublesome: 


Cement plasters tend to trap moisture behind them, creating an even more serious damp problem when water, like rain or rising damp, seeps into the building fabric.


Gypsum plasters, like Gypsum Multifinish, are quite sensitive and show unsightly patches even with a small amount of moisture.


When removing old plaster, it’s best to enlist experienced builders who handle the building fabric delicately. Cement can be stubborn and might pull bits of brick along with it, so a gentle approach is key.

Can traditional lime bathrooms be water repellent AND breathable?

Venetian Building Restoration Master answers “Yes!”

Mr Naldo Busato is a Venetian Building Restoration Master Craftsman, the last link of a multi-generation guild tradition of Venice. Leading researcher of Roman Architecture and Roman building materials.

We will frequently update you on the magnificent skills and lime based solutions we learn from him.

How to make a lime finish water repellent for your bathroom?

This method can be applied in shower cabins or above the bathtub to make a freshly lime plastered wall water repellent.


The process is simple and the mixture can easily be prepared, just like the Romas did: two parts natural soap and one part olive oil are thoroughly mixed together, and worked into a smooth lime plaster finish. The process is repeated a day later. When the wall dried the result is a lovely water repellent finish.


Its maintenance is also very simple: If the wall doesn’t seem to perform as expected, you just repeat the procedure and work the mixture into the lime again. 

What lime products shall we use in extreme humid environments?

Naldo’s suggestion is Cocciopesto Deumidificante , based on the original Roman recipe.

Cocciopesto stands for “crushed bricks.” As the name suggests, Cocciopesto lime plasters are produced with a large percentage of crushed brick aggregates.


While many great building materials and lime plaster recipes were developed by famous Roman architects, such as Vitruvius, these Cocciopesto plaster recipes were actually inherited by the Romans from the Phoenicians (2500 BC – 64 BC). 


Why Romans adopted it has to do with the fact that this lime plaster mix is the ingenuity of simplicity. When porous brick and lime mortar structures are plastered with a brick and lime plaster mix, the result is the perfect harmony between the building and the plaster. Same breathability, same thermal expansion, same flexibility. It means no cracks and no detaching plaster, no unwanted side effects. The building and the plaster become one.


On top of that, Cocciopesto plasters tolerate extreme heat as well as extreme humidity.


The Coccopesto Deumidificante plaster is the improved version of the above ancient recipe, to maximise its humidity regulator capacity. As a result it improves the air quality of cellars, shower rooms and other humid environments.

Need help or expert advice on your project?

We are happy to point you in the right direction 

Heat Storage Lime Floor

Breathable, Heat Storage Lime Floors

The Ultimate Guide with Ancient Roman Flooring Techniques

Are you in search of the perfect flooring solution for your home, one that ticks all the boxes – durability, water resistance, insulation, and heat retention?

We’re about to unveil the timeless charm and practical benefits of breathable lime floors, tailor-made for modern living.

Meet "Massetto Caldo" – Your Warm Floor Companion

At the heart of this remarkable flooring concept lies “Massetto Caldo,” which translates to “warm floor.” 


But why the name? 


Well, it’s all down to its Roman heritage. You see, this special flooring contains crushed bricks that store heat, ensuring that once it’s warmed up, either through underfloor heating or other means, it stays toasty for an impressively long time.


Padlo1

A Nod to Roman Wisdom

Let’s take a moment to appreciate the wisdom of our Roman ancestors.


They pioneered the concept of underfloor heating systems, known as “hypocausts”, which were powered by hot air rather than  hot water pipes. These systems used similar materials for both floor structure and supporting columns, including lime, terracotta-lime, and thermal brick.


Even when the fire was not ablaze, these systems radiated warmth, keeping their homes at a comfortably temperate embrace.

Insulation – The Secret Behind Comfort

Now, to keep all that precious heat right where you want it – inside your room – there’s a crucial layer of high-performance insulating lime mortar.

This isn’t just any insulation; it boasts reflective properties – reflecting the pleasant heat back into your room. 


This will help bring down the U value of your floor to meet modern standards.

Heat Storage Lime Floor

Waterproofing - For the peace of your mind

Worried about water seeping in?


We can add a layer of Roman waterproofing mortar for added peace of mind, ensuring no liquid mischief creeps up from below. This is how you take a lime floor and bring it up to the standards of today’s discerning homeowner.

Any Questions? 

Why Massetto Caldo Trumps Concrete

We firmly prefer Massetto Caldo lime floor screed over cement based systems, and here’s why: the heat retaining brick fragments it contains make it noticeably warmer to the touch.


Even without underfloor heating installed, it provides a cosier floor compared to modern alternatives.


However, when paired with underfloor heating pipes, your floor screed becomes a reliable heat reservoir. Once the heating is turned off, your floor will stay warm for quite some time, promising comfort and energy efficiency.

Massetto Caldo MGN – Revolutionizing Underfloor Heating

Massetto Caldo MGN takes your underfloor heating to a whole new level of efficiency and warmth. Lab measurements reveal that brick powder and terracotta shard screeds output approximately 16% more heat, retain it longer than similar cement screeds, and warm up your living space faster.


This is the exact reproduction of the historical, original recipe – warm on its own, perfect for radiant floors, easy to spread even with a plastering machine, lighter than traditional screeds, and the ideal base for prestigious Venetian or wooden floors.

In Conclusion

In the world of flooring,  these breathable lime floors represent the pinnacle of modern comfort while paying homage to an ancient Roman technique.


They’re the perfect blend of aesthetics, durability, and functionality – just what every homeowner dreams of.

So, if you’re contemplating a flooring upgrade, consider the time-tested allure of breathable lime floors. Your home will thank you.

Comparative Performance Test

For those eager to see how Massetto Caldo stacks up against conventional cement floors, we’ve got a comparative performance test for you right here, if you scroll down to “Comparative performance tests for the Science minded”: Massetto Caldo MGN.


Choose warmth, choose durability, choose perfection – choose breathable lime floors for your British home.

Scroll to Top